
|

|
1AM
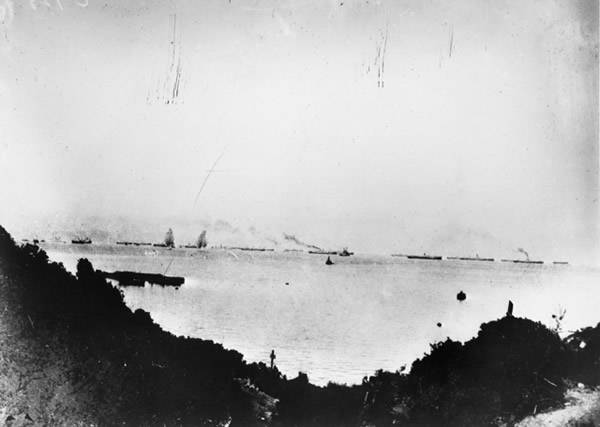
The battleships, destroyers, and transport ships stop at sea, and a contingent of troops begin the landing process in the dark - but no New Zealand battalions will land for hours.
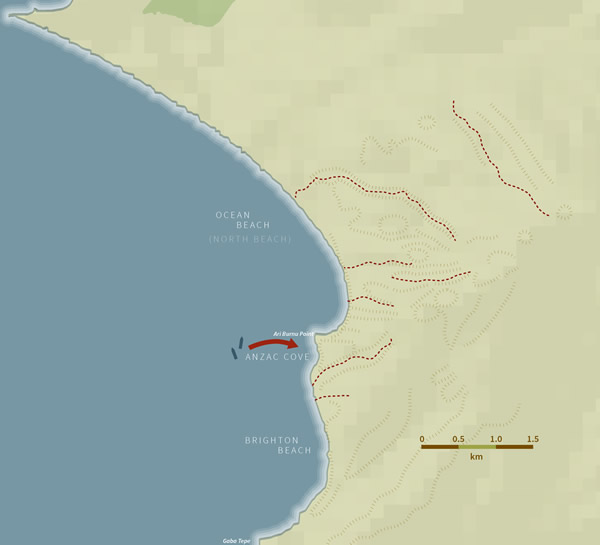
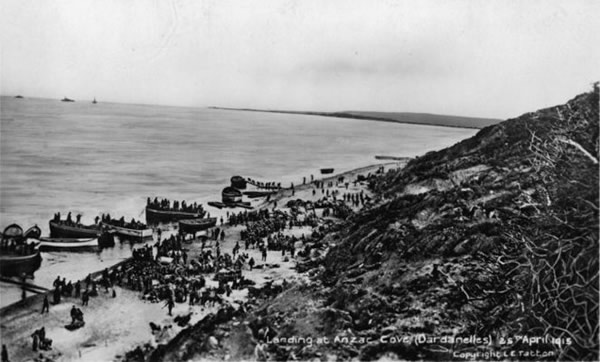
Due to an error in calculating tidal effects and a spot of bad luck, the troops land about one mile north of their intended target. Instead of facing gentle slopes and a wide beach, the troops arrive at Anzac Cove, with a tangle of steep cliffs and gullies up to 91m in height rising up above them.

4:38AM
Turkish sentries begin to open fire on the landing ships.
8AM

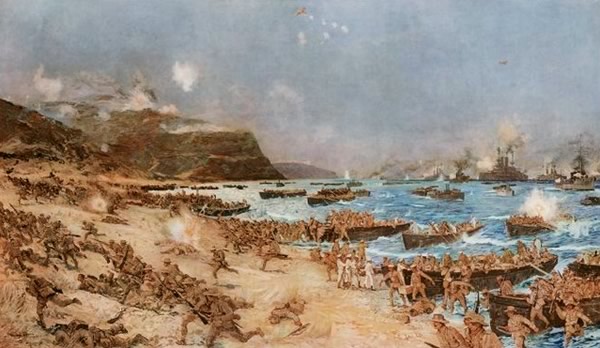
With an estimated 8000 Australians already ashore, the first Kiwis begin disembarking the TS Lutzow after a night sleeping on the deck and a nervous breakfast.
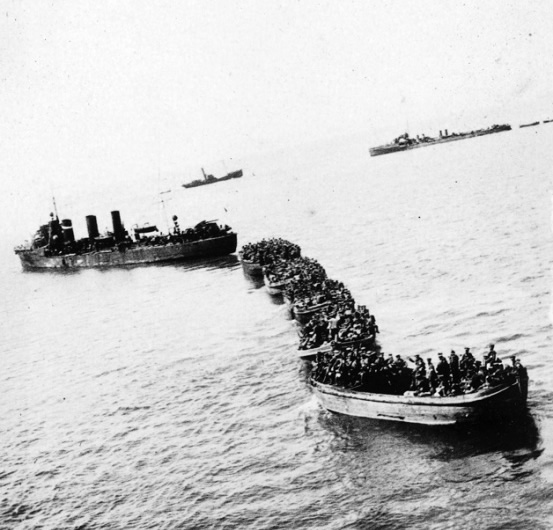
This group of Aucklanders ride in already bloodstained ‘lighters’ - converted lifeboats towed by a steamboat. Turkish machine gun fire begins almost immediately, injuring Private Charles James Skinner before he makes it to shore.
10AM

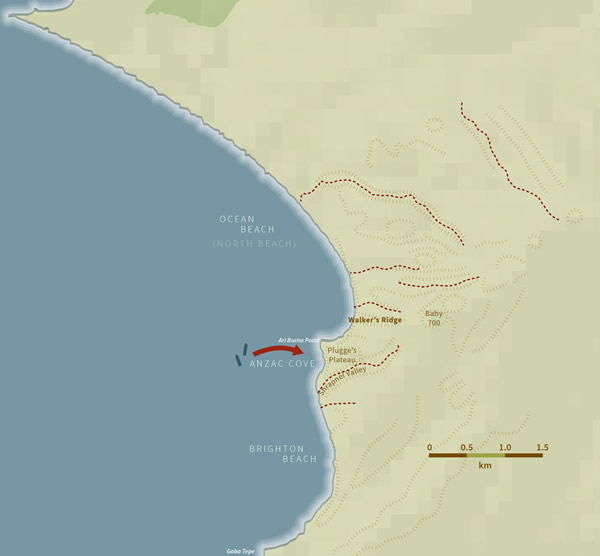
Aucklanders continue to land on the narrow beach, with orders to reinforce the Australians, who are struggling to hold a position on the narrow Walker’s Ridge. Their aim is Baby 700, an inland hill that overlooks the entire area.


Back on the ships, the first Canterbury soldiers begin to disembark, one or two hours behind schedule.
1PM


The Aucklanders have been told to change course, as the narrow goat track of Walker’s Ridge will necessitate single-file. Their new route takes them over Plugge’s Plateau to the south, named for Lt-Col Plugge, then onto Shrapnel Valley. They are easy targets for Turkish snipers and artillery from higher ground.
The Cantabrians have been told to join them, but they become confused over the plateau, mixing up with the Aucklanders and Australians.
2PM


New Zealand troops are spread out across the front. Two Waikato platoons make it to the slopes of Baby 700 before retreating under heavy sniper fire, with 39 deaths and many more wounded.

2.30PM
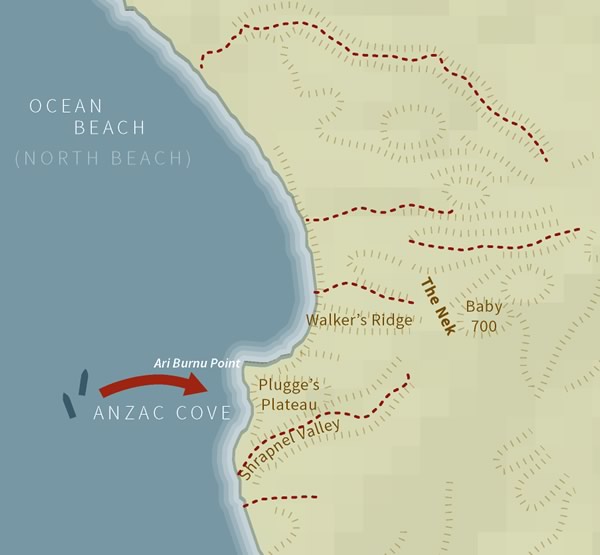

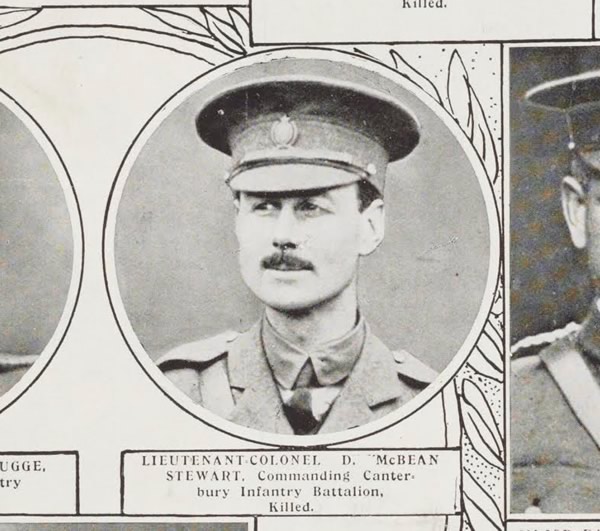
The Otago troops come ashore. Lt-Col Stewart has rushed forwards with a unit mostly made up on Cantabrians, making it to an inland sector of Walker’s Ridge known as The Nek - it is extremely narrow.
3PM


Canterbury soldiers left confused on Plugge’s Plateau have regrouped and travelled further north up the beach. They climb through Malone’s Gully and rush a Turkish trench near Battleship Hill. After three tries they take it - but the Turks behind the line continue to fire upon them.
4PM
Returning to The Nek with a larger force, Lt-Col Stewart is shot dead. Anzac troops push past it slightly, then dig into their position at The Nek. Both sides make Bayonet charges.

4.30pm
The Wellingtonians make it ashore under heavy fire.
5PM
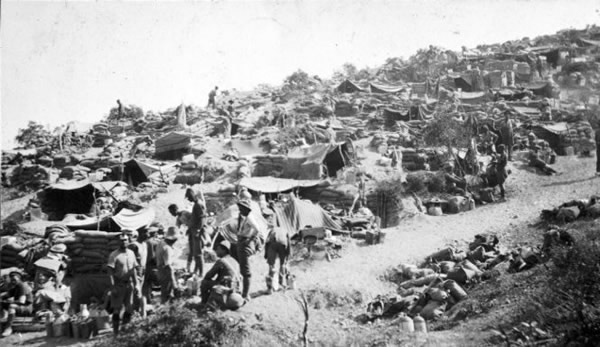

The New Zealand Infantry Brigade HQ arrive on shore, far too late to direct the Kiwis to do much. Throughout the dusk the hard-won positions are dug in, and the fighting continues.
11PM
A conference to discuss the disastrous day is held. At least 153 Kiwis have died, while around half a thousand have been seriously injured. Auckland has lost 100, as they came ashore earlier than most. The horror is far from over.